31 July 2012

Olympic Nails!

Hello! Today I have for you a super special manicure. This is my first detailed themed manicure here on Clever and Colorful! 


For this manicure, I used about 15 polishes; the ones you can probably pick out are OPI San Tanio, China Glaze For Audrey, and Zoya Dove. 


Here's some more detail in case you have any questions about polishes or design:
Thumb: Olympic Rings '2012'
            Background is one coat of generic white topped with Sally Hansen Polar Bare and Orly Winter  Wonderland. Rings are all made using Stripe Rite polishes. The 2012 was made using a nail art brush dipped in Barielle Gelt Me to the Party. 
Pointer: Bicycling
            Background is For Audrey, Grass (which was sponged) and Road are both Stripe Rite polishes, person is made with a white Stripe Rite.
Middle: Water Polo
            Background is Dove dotted with virtually every Stripe Rite I own using a dotting tool, which I intended to be the crowd watching. The water is a mix of the blue Stripe Rite and For Audrey. Person, again, is the white SR.
Ring: Big Ben at sunset
         Background is a sponge gradient of SR Yellow, SR Red, and ChG Traffic Jam. The clock tower is San Tan-tonio, Dove, and White SR outlined in the black SR. Birds are also black SR. Lines of Big Ben are the Gold SR.
Pinky: Beach volleyball
          Background is For Audrey, sand is San Tan-tonio. Net and person is white SR, outline is black SR.


The people in my designs are white because I took the Olympic symbols for cycling, water polo, and beach volleyball and inserted them onto a colorful background.

For those of you wondering, my right hand is painted with no detail at all. Thumb and Middle are Zoya Dove (thumb is topped with Orly WW), Pointer and Pinky are For Audrey, and Ring is the same stamping gradient. Just a compliment to the designs on my other hand.


I really hope you like this! It's something I don't usually do, but I was really inspired! What do you think? Are you watching the Olympics?


Thanks for reading,


Janna

30 July 2012

Batman-Inspired Nails for Otakon

Hey there!

So I've been quiet for the last couple of days because my mom, sister, and I headed to Baltimore for the weekend. My sister and her friend were going to Otakon, the anime convention that is held there every year, so my mom and I went to enjoy the sights and, of course, the food.

I'll do another post about the things I bought there, but for now I'm going to show you the nail design I created for my sister. She was going to Otakon decked out in all of her Batman apparel: a belt buckle, earrings, converses, shirts (one for each day), a bag, sillybands, arm bands, lanyard ...not to mention all of the other Batman stuff she owns that didn't come with her. Needless to say, she's a huge fan and could talk for hours about any of the movies, TV series, or characters.

So for this weekend, I did a Batman-inspired nail design for her. She didn't want Batman nails, but just nails that were black and yellow.

Here's the recipe:

  • Two coats of Sally Hansen Insta-Dri in Lightening (which, if you haven't noticed, is my go-to yellow), topped with one coat of Sally Hansen HD in Lite
  • To all but the ring fingers, I added one coat of the black glitter I bought in Spain
  • A black Stripe-Rite on the ring fingers
  • OPI Servin' Up Sparkle
The ring fingers were supposed to be topped with a stamp from Mash plate m72 (the slashed lines image), but of course, I couldn't find my stamper when I was doing this manicure. She was really bummed that she couldn't have the stamped image, but eventually I convinced my sister to let me do a similar-looking design on her ring fingers with a nail art polish. I think it turned out pretty good! Then I topped the design with OPI Servin' Up Sparkle.


NANA NANA NANA NANA BATMAN
So, what do you think? I really liked how they came out and she got a ton of compliments at the convention. Are you a Batman fan?

Thanks for reading!!

Janna

27 July 2012

Super Quick Rainbow Liner!

Hello everyone!

I have a short post for you today because I should be sleeping because I'm off to Baltimore tomorrow! I'm so excited =]

I'm bringing back Face Paint Friday with this post. Here's a super quick cool-toned rainbow eyeliner look I did recently. I've really been into using bright eyeshadows on my lashline as liner lately. I love the effect =]


I started with a base of my bright teal liquid eyeliner, a no-name brand that I got in the clearance bin of a Mandee's. The stuff has incredible pigmentation and staying power. While it was still wet, I layered green and purple eyeshadow on either side and added some yellow to the inner corner. I love the gradient effect. This is a great way to wear bright colors if you don't want to be obnoxious or feel self-conscious.

What are your favorite bright eyeliners? I'm on the search!

Thanks so much for reading,

Janna

24 July 2012

"Jewel" Tone Manicure

Hello there!

Today I really wanted to share with you an entry I made for a nail art contest. I really loved the result!

First I started with two coats of OPI San Tan-tonio for opacity. Then I added thin lines with my gold Stripe Rite to use as guides.


Then I just filled in the lines using the nail polish's own brush in one straight swipe of lacquer. I did have to retrace my lines a few times, but they ended up pretty straight.

The red is OPI Bullish on OPI, the orange is a mix of Finger Paints Courdur-Orange and Sally Hansen Insta-Dry in Lightening, the blue is Zoya Breezi and the purple is OPI No Spain No Gain. The accent nail is a bunch of 3mm and 2mm rhinestones in coordinating colors that I got from the Born Pretty Store. Jewel tones are by far my favorite color family!


This manicure took some time to do and I've been itching to do an all-rhinestones nail for a long time. I loved it! Please tell me what you think!

Thanks so much for reading,

Janna


23 July 2012

Italian Manicure!

Hello! Sorry that my absence was longer than I thought! I was burnt out from volunteering and took a couple days to do literally nothing.

Today I have for you a special holiday manicure! The reason I was volunteering last week is because my town has a very long-running (137 years, to be exact) festival to celebrate the feast of Our Lady of Mt. Carmel. Taken from the Mt. Carmel Society webpage, the Mt. Carmel Society, who organizes the week-long festival, "is an independent nonprofit Catholic Organization formed in 1875 by Italian immigrants new to Hammonton, New Jersey, who took time to celebrate their safe journey to America and a successful harvest by giving praise and thanks to the blessed Virgin Mary." The 16th of July, the Feast Day of Our Lady of Mt. Carmel, is regarded as a holiday like any other; for example,school and town offices have off!

Since this festival is deeply rooted in Italian tradition and I myself am Italian-American, I did a festive manicure! Lots of layering was involved for this. All red areas are two coats of OPI Color So Hot it Berns with one coat of OPI Animalistic on top. Green areas are two coats of Orly Wandering Vine topped with both China Glaze Glittering Garland and Zoya Ivanka. The white is a no-name white cream topped with Orly Winter Wonderland. Here's the result:


This was a fun manicure and I got a lot of compliments! I hope you all like it as much as I do =] Are there any Mt. Carmel festivals near you? I know there is at least one other in New Jersey.

Thank you so much for reading! Let me know what you think!

Janna

11 July 2012

China Glaze Pink Plumeria + Stamping


Hello!

How are you doing today? I'm spending my week volunteering at our Mt. Carmel festival serving sandwiches, so there aren't going to be many posts.

I had to stop in to show you my current manicure, a China Glaze Summer Neon: Pink Plumeria. I debated this one but it looked pretty unique so I got it. I actually need to go back and get Splish Splash and Orange You Hot? because I passed on those and am regretting it. Hopefully I won't be too late!

I started with a base of 2 coats of Pink Plumeria and then stamped it using the flower image on Mash plate m64 twice; the first time I used Essie Shifting Power and the second time I used Barielle Gelt Me to the Party. Neither polish is a good stamping polish since the image never completely transferred either time, but together they create a delicate look.

Oh, and please excuse these pictures. My white balance auto correct turned my hands/everything blue-ish, but the polish color is true to real life.


What do you think? What Summer Neons are your must-haves?

Thanks for reading! Wish me luck out there in the heat!

Janna

07 July 2012

China Glaze I'm with the Lifeguard

Hello!

I think I've caught the China Glaze Summer Neon fever....it started out slowly and I thought I needed only five...but I think I'm going to go back and get the rest of the shimmer ones. I better go soon!

So today I have I'm with the Lifeguard, a shimmery neon green. This polish is super bright! I was afraid the shimmer would make it look streaky, but it didn't! Two perfect, easy coats. My pictures here show one coat of Out the Door topcoat, too.


Any imperfections are my fault, not the polish's


How gorgeous is that shimmer? It's a little yellower in real life than it looks here; sorry for my bad photography! What do you think of this polish?

Thanks for reading! Do you have Summer Neon fever?

Janna

06 July 2012

Sephora + Pantone Universe Collector's Edition Set: Tangerine Tango

Hey hey!

Today I'm bringing you my latest obsession: the Sephora + Pantone Universe Collector's Edition Set in 2012's Color of the Year, Tangerine Tango. Oh my goodness this is awesome.

So Tuesday, July 3rd was my fourth dating anniversary with my boyfriend. Since he usually gets me polish, I told him to let me make some suggestions as to what I wanted instead of him going in blind to look for himself. I sent him the link of this on the Sephora site and didn't get to send him anything else because I couldn't make up my mind as to what Illamasqua polishes I want =P

Then, on Tuesday, I thought I'd have to feign shock as I opened up one of my gifts since I knew what it was, but I really was shocked because this thing is huge! Here's a picture. It's 14 x 8 inches for reference.


Seriously? This thing is gorgeous. And all of the individual pieces are huge as well! I thought that since this was a set the components would be small-ish, but these are huge even for individual pieces.

The inside:

Taken from the Sephora website:

This set contains: - 0.02 oz Color of the Year Eyeliner in Tangerine Tango Twist
- 0.31 oz Color of the Year Eyeshadow Quad
- 0.35 oz Color of the Year Prisma Chrome Blush
- 0.38 oz Color of the Year Blush Duo
- 0.1 oz Color of the Year Créme Lipstick
- 0.17 oz Color of the Year Lip Gloss


Six pieces for $48. Can you beat that? These pieces retail for $118! Let's take a closer look!


Super blurry picture of the eyeliner. My camera did NOT want to focus on it. But it's a really soft point that writes very easily and twists up. I'd say it's a true Tangerine Tango shade - a very red-orange - that isn't as coral as the other pieces of the set. The name on the liner is "Tangerine Tango Twist." It has microglitter in it that is barely noticeable but flickers when you move; the particles are so small that it reads as a shimmer. Love this and can't wait to rock it on my upper lash line!


Um, yeah, this quad is gigantic. The frosted top of this attaches by the four magnets that you can see at the corners. They are super strong, maybe even too strong (you really have to pull to get it to come off), and you definitely do not have to worry about it coming off accidentally. They 'snap' fiercely into place. The cool thing about this closure is that you can also twist the top to expose the shadows and have it attached by just two adjacent magnets. Clockwise, these shades are Carnelian, Scallop Shell, Sparrow, and Pavement. They're all shimmery, Carnelian with coordinating shimmer, Sparrow with magenta shimmer, and Scallop Shell and Pavement both with multi-colored shimmer. Love.


Next up is the Prisma Chrome blush. I've seen tons of raves about this product, and it's super pretty, especially the 3D design. This color is called Apricot Brandy and it's a peach with gold, orange, and perhaps green microglitter. Again, they are glitter specks that you can pick out, but the blush reads as a shimmer. I found the packaging a little hard to open at first, but like the other pieces, it's definitely secure and won't open unless you want it to. Love it.


Here's the lovely blush duo, featuring Desert Flower and Coral. Desert Flower has mostly a flat finish with very sparse shimmer particles and Coral features the same shimmer/glitter as in Apricot Brandy: gold, orange, and green. This duo has the same strong magnetic closure as the eye quad. Again, how huge is this? 


Here's the gloss! The shade is Tangerine Tango Luminous and it's a light-medium orange with a red undertone and some orange, pink, and gold microglitter. Despite the name I wouldn't say this is a true Tangerine Tango shade as it's not dark or red enough, but it's still really nice. Note the unique, flexible applicator! This shade is pretty but I'm not sure if I'm sold on how sparkly it is. In my experience, even after the gloss is gone, your lips are still sparkling. Oh, another thing: this gloss has an almost fruity scent to it and no taste. 


Next up is the lovely lipstick in Tangerine Tango Cream. Unlike the lipgloss, this is the true TT color: a deep red-orange. This has the same fruity scent as the gloss and I love the ridges in the bullet. Another awesome thing about this lipstick is the magnetic closure; you can hear it click shut as the pieces attach, so it's really secure and the cap won't come off in your purse (cough experience). Very pretty and bright. Can't wait to wear it!


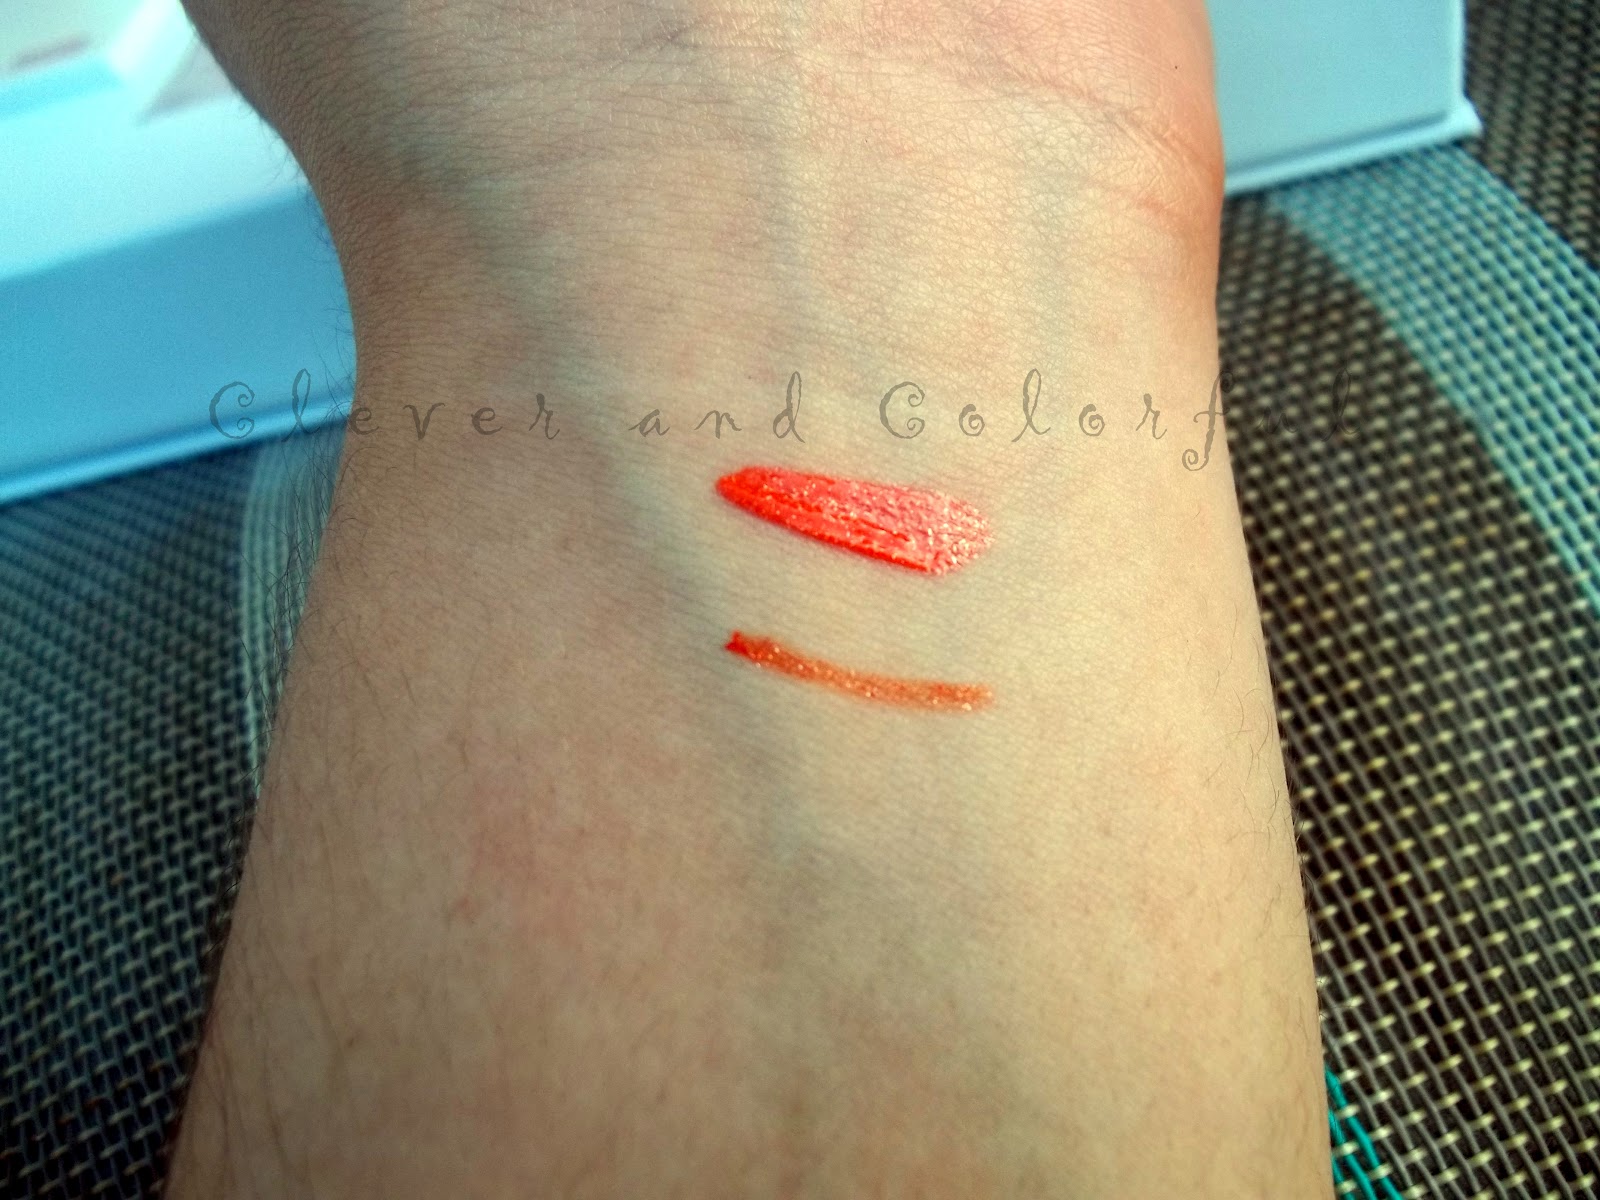
Finally, here are just two swatches: the gloss and eyeliner. Imagine the gloss swatch (top) a bit more of a true orange; it photographed a little too coral and too bright. Oh, and don't mind my translucent skin. I'm an NC 15/20ish for reference.


So yeah, I'm obsessed with this and keep opening it up to play and swatch. I didn't do formal swatches of the shadows or blushes but i did apply a bit to my fingers and rest assured that these are pigmented. I can't wait until there are more colors of the year so I can have more collector's sets! They're still available as of today on sephora.com if you're interested! I highly recommend if you don't mind shimmer.


The only negative thing I can think of, and it's just a technicality, is that the orange pieces of this set are not all true Tangerine Tango shades, but I can understand that that shade is not as flattering or wearable for all skin tones, and the coral/apricot/carnelian derivatives are much less obnoxious. That being said, I love that they all aren't true TT shades; it gives variety and compliments the shade instead of the user drowning in it. I just had to think of a negative so this post has some authenticity =P It's only a negative thing if you want to drown in it.


PS. My nails in this post are my berry ombre from yesterday!


Do you have anything from the Sephora + Pantone Universe line? And another important question: When you have collector's sets or LE pieces, do you hoard them and leave them pristine, or use them? I'd love to hear!


Thank you so much for reading! What do you think of this set?


Janna

05 July 2012

Berry Ombre Manicure

Hello!

I'm back today with a Clever and Colorful first: an ombre manicure. Ever since I started my blog in July 2010, I've wanted to try an ombre manicure. For some reason, I found them incredibly intimidating because I never thought I could create the perfect fade on my nails and I'm super picky.

But on Tuesday, when I was looking for a pretty berry color to compliment my beige dress and printed shoes, I pulled out OPI Ate Berries in the Canaries and then a bunch of other berries and reds from the OPI Colección de España and I put together a little group. I could have probably used other polishes to make a smoother fade but I decided to stick to all the same collection for some consistency.


Thumb: Pink Flamenco
Pointer: Ate Berries in the Canaries
Middle: Mix of Pamplona Purple, Ate Berries in the Canaries, and No Spain No Gain
Ring: No Spain No Gain
Pinky: Manicurist of Seville


The middle finger started out as just Pamplona Purple but it looked more like a skittles mani than an ombre so I mixed one. I'm really liking this look and it's fun to wear different shades on your nails! I can't believe I waited so long to try it..it's definitely not as hard as I thought!

So how about you? Have you tried an ombre manicure?

Thanks for reading!

Janna

04 July 2012

Celebrating!

Hello! Happy Fourth to my American readers! And happy hump day to my non-American readers =]

This year for the fourth of July I didn't do my nails because I had just done them the day before to celebrate my dating anniversary with my boyfriend, and I wasn't ready to get rid of that manicure yet (I'll post that tomorrow). So nail blogger fail.

But I did do something fancy to my hair using my hair chalking tutorial to celebrate this holiday. Take a look:


Red and blue hair! I thought this looked really cute =] And my nails are my berry ombre that I said i'll post about tomorrow.


So I hope everyone had a great day! I spent mine with family eating great food and watching fireworks! How did you celebrate the fourth or spend your Wednesday?

Thanks for reading,
Janna