30 July 2010

PHD Vampire Challenge Mani

Hello Everyone!

I've noticed I've been getting into a pattern. I'll do two posts in one day, and then nothing the next, then two posts the next day. . . sorry if that's annoying =]

The deadline for Polish Hoarder Disorder's vampire challenge is in half an hour, and thankfully I got this manicure done days ago. When I first saw it was a vampire theme, I was a little hesitant to enter, but then I started getting some really cool ideas.

My very first idea was to file my nails to a point because I thought that'd be really edgy and definitely vampire-like....vampirish? But I felt that A) my nails weren't long enough to look good like that, and B) I didn't want to sacrifice my nails. So I worked with what I have.

I tried to pull off a classy, gothic vampire look. Vampires (at least the original kind, that DON'T sparkle) are pretty sophisticated, in my opinion. Originally, they were going have a red base instead of the purple, but I really think the purple is what makes this whole look. I actually wore a lipstick that color when I dressed as a vampire for Halloween a couple years ago. lol =]

Here's the picture I submitted:
P1040420


I was pretty proud of this =]

Here's what I used:
100_0152

The plum is a no name polish from The Color Workshop. French tip done in Rimmel's 399 Black Satin, and Konad done using Rimmel's 414 Insolence with Bundle Monster plate BM12.

The plate:
P1040396


Here are some more pictures if you like. It was hard to get the camera to focus on the subtle design.


P1040399

P1040388

P1040387
Flash

P1040381
Pre-Konad and Pre-Cleanup

P1040404


So that's my challenge mani. It was my first PHD challenge that I've entered and I can't wait to do more. I'll post a link to the Challenge Gallery HERE once it's posted.

29 July 2010

My Three Water Marbling Attempts

So this is basically a follow up to my last post, How to Water Marble.

I first got into water marbling a little over a month ago. I had heard about it for a super long time, but I never looked into it or knew how it was done.

My first attempt was on July 2nd I believe. I tried to do a red, white, and blue manicure for the 4th of July, and it was a disaster. Sometimes the polishes would drop to the bottom, but sometimes they'd spread nicely, and other times the colors would all blend together and make a purple color, which definitely wasn't what I was going for. Looking back, I should have started with something easy, but that's never my nature =P

So I did my first nail and decided it came out pretty good. Then I did another nail and decided that that one looked soooo much better than the first, and that I should redo the first one. I had only had 4 nails finished and each had been done twice when I finally stopped. This was probably because I hated how different each nail looked, even though to some, that's part of the fun of it lol. I kept taking the polish off after deciding I didn't like it, and then I got too frustrated to keep going. My nails ended up neon orange for the fourth of July instead.

A week or so later I decided to try again. My two favorite colors are light green and purple, so I did a green, blue, and purple water marble, which I thought was a really pretty color scheme. I didn't really try any special design for this one, just a couple lines in opposite directions, but it came out pretty decently.

For this I used Savvy's French White White as my base, and for marbling I used Pure Ice Wild Thing, Wet n Wild Caribbean Frost (a turquoise color), and China Glaze Coconut Kiss. I hadn't thought of starting a blog at that point, or even taking pictures of my nails, so what you're seeing here are pictures I took with my webcam so that I could show them to friends I don't see often.

Sorry about the poor quality.

Photo_00053
Right hand

Photo_00051
Left hand

Photo_00052
Thumbs


This took probably two hours to do, which sounds like a really long time, and I guess it is. The polish cooperated most of the time and I had to redo a couple nails, but it was a much better experience than my first try.

I thought it was pretty good for one of my first attempts, and I got soooo many compliments on them. It was crazy. I feel like I had to explain water marbling a hundred times to everyone that said, "YOU did that? YOURSELF? How?!"

I wore those for at least 10 days, with chips here and there that I touched up, and I kept adding coats of topcoat. I finally took the polish off after I was done a week of volunteering; three of my nails broke and the chipping got really bad.

So I was finally ready to do it again. Step by step instructions and the polishes I used are included in the How to Water Marble post (another link for convenience).

I took a TON of pictures of these. It was so easy! The polish cooperated every single time and I didn't redo a single nail! Pretty good right?!

100_0117

100_0115

100_0120

100_0118

100_0129

100_0132

100_0133
Left Thumb

100_0136
Right Thumb

100_0137

100_0140


I love them! (Can't you tell? I have enough pictures =P) My favorite nails are my left index finger and ring finger, and my right pinky. I still can't believe how easy this was =] I'd say this took me about an hour to an hour and fifteen minutes, not counting cleanup, dipping each nail by itself (and I was taking my merry old time).

I had tons of fun with this! Please give it a try if you haven't already =]

Thank you so much for reading! I hope you enjoyed looking at my nails as much as I do! =P

Janna

How to Water Marble

Hello again!

Yesterday I created my entry for Polish Hoarder Disorder's Vampire Challenge, and I submitted my entry this morning. I'll post those pictures tomorrow, on the challenge's deadline. But after I put those dark colors on my nails, I needed something bright, so I decided a rainbow colored water marble would be best! lol. Warning: lots of pictures ahead.

I'll walk you through how exactly I did it, and I'll put a link to the actual manicure pictures HERE. Almost everything I did I learned from Colette of My Simple Little Pleasures blog, along with a small bit from my own experience along the way. This is only my second water marble I've ever worn, but the third I've attempted. So this is how I did it!
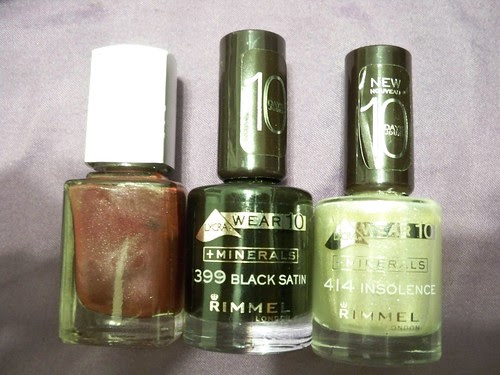
Polishes used:
100_0144

I'll name these polishes as I mention them in my directions.

You'll also need lots of toothpicks (I must use at least 20 per manicure), Scotch tape or vegetable oil, scissors, paper towels, a cup, and water.


Step One: Apply a base coat (I used Avon Smooth Beginnings) and 1-2 coats of a base color to your nails. I chose white since I had so many colors going on, and I used two coats of Savvy Nail Color in French White White. Let dry completely.

Step Two: Fill a small cup with water.
100_0082


I actually used to drink out of this cup as a toddler, so that gives you an idea of how small it is. To fill the cup, I run filtered water out of my tap into a Pyrex measuring cup and then heat it in the microwave for about 20 seconds, just to take the chill off. If I fill the Pyrex cup to the top, I just leave it out on my table after heating so I can easily change the water without having to run the sink again, since the cup I use is so small (I usually change the water I'm using after every 2 or 3 nails). NOTE: make sure you don't use anything that's too good, because the cup will be a mess after water marbling.
After the cup is filled. . .

Step Three: Tape off your finger with Scotch tape.
100_0094


I followed Colette's YouTube video exactly for this step. Some people choose to coat the skin around the nail with oil, but I'd rather just tape it off. This is to protect your whole finger from being covered in nail polish.

Step Four: Open all your polish bottles, and one by one, in whichever order you choose, drip them into the water so that they start to spread out.
100_0095


I chose to drop red first, followed by orange, yellow, green, blue, and purple, for no reason other than that's what I felt like doing. The red, orange, yellow, and green are all Pure Ice polishes, and are Crimson, Hot Tamale, Excuse Me, and Wild Thing, respectively. The blue is L.A. Colors Static Electricity and the purple is an old Wet n Wild in 417E. I suggest playing around with the colors before starting, as some polishes won't spread well, some will dry super fast, and others will just drop to the bottom of the cup. The farther the color spreads, the more sheer it will be, and this is why I use a small cup; the color doesn't have as far to go, so I get a relatively opaque color on my nail. (I tried the smaller cup after the first time I marbled, because I hated how sheer the colors were on my nails when I used a larger cup.)

Step Five: With a toothpick, pin, orange stick, or really anything with a thin point, swirl the colors around to make the desired design.
100_0096


I chose to do four lines to the center and four lines away from the center, and I really only picked that because it was the easiest way for me to fit all the colors on my nails without the colors blending together. NOTE: When marbling, you have tp work fast so the polishes don't dry on top of the water. If they do, you won't be able to drag the colors and make a pretty design. =] Instead, the polish will just stick to your toothpick and you'll have to start over.

Step Six: Find a spot of your design that you like, and press your taped-off nail into that part of the design. Then, clean up the excess polish with a toothpick.
100_0097

(this one's blurry, sorry. I took it with my left hand =p)

I think for this one I aimed for the bottom part of the design, and the right side of the little "petal." On all of my nails, I aimed the red part toward the tip and the purple near my cuticle, and I got nice lines of each color on my nails. After you dip your nail, the excess polish will most likely be dry. Dipping your toothpick in will cause the dry polish to stick right to the toothpick, making for an easy cleanup. Also, you could dip two nails at once, but since I'm a perfectionist, I prefer to just do one so I can get the nail exactly where I want it. Plus, this design is not easy to do with two nails.

Step Seven: After the excess polish is cleaned up, remove your finger from the water and remove tape.
100_0098
100_0100


Now you can definitely see how helpful that tape was! So there you have your design, and now all you have to do is clean up the stray polish with a Q-tip or brush dipped in nail polish remover. Also, if I find that one section of color is really sheer, I'll go back over that section with a small nail art brush dipped in that color. For example in the picture above, you can see that the yellow is pretty sheer, so I dipped my brush in the yellow polish and basically "colored in" the yellow part darker. This is completely optional though; hopefully your design will come out perfect without this!

So then I just topped it with my go-to topcoat, Beauty Secrets.

Here are some bonus pictures:

100_0083
My workstation

100_0106
Even the trash is pretty! =P

100_0107
This shows how small (and adorable) that cup is =]


(And yes, that is a Hot Topic polish in the background of that last picture; my sister gave it to me today, and I'll swatch it at a later date!)

So, here's the look pre-topcoat, and even pre-cleanup. For pictures of this finished manicure, like I said earlier, click HERE.

100_0105


Please give this a try! It takes practice, but once you get the hang of it, it gets easier. Plus the results are awesome!

Thank you for reading this incredibly long entry, and special thanks to my 7 followers =]

Have a great day,

Janna

27 July 2010

My New Favorite Polish and my Old Mani, Revamped

Background Story:

The other day, my boyfriend was shopping and I was texting him about nail polish. =P During conversation, he asked me about what colors I wanted to buy, and I told him I wanted to get some light blues and browns. Long story short, he walked into Ulta all by himself, asked one of the employees for help, and ultimately purchased a bottle of Sally Hansen's Hard as Nails Xtreme Wear polish, FOR ME =] What a great surprise! So this color is now my new favorite. I mean, in the past he's felt uncomfortable even walking in Ulta with me, so this was a big step, lol. What's the color, you ask?

P1040349

P1040347

P1040346


So I'm now a proud owner of Blue Me Away! This is my second ever Xtreme Wear polish. Application was awesome, and it was near perfect in one coat! The bottle pictures aren't even close to the actual color though. The true color is really right in between the colors shown in the flash and no flash pictures, a deep sky blue.

I put this on my toes and I love it! I'd describe it as a deep sky blue that almost leans teal.
P1040369
Blurry, but this is quite close to the actual color of the polish.

P1040379
My toes in cute shoes =]


(EDIT: this color stained horribly, even with a base coat!)

I'll swatch this color later on my nails =] I finished it off with a sun design from my new Bundle Monster fauxnad plates. This design is from BM01, done with Design-a-Nail polish in Frostbite. Closeup:
P1040375


Well I had so much fun with this that I decided to add a design to my current mani. This is Bundle Monster plate BM03, a flower, done in Sally Hansen Diamond Strength "Sunrise, Sunset." (I added rhinestones shaped like cherries to my ring fingers out of boredom on day 2 of wearing this; ignore it =p)

P1040335

P1040331


Blurry of course, but I really like the design and I definitely can't wait to keep playing with my new plates.

Tomorrow I'm going to design my entry for Polish Hoarder Disorder's weekly challenge, and then maybe attempt a new water marble. Every time Colette posts a new entry about one, I feel the need to do it.

That's it for today, and since I've posted two entries, I'm sure you've had your fill. Thank you for stopping by!!

Janna

P.S. My new favorite snack. This is a winning combination!
P1040343

Fauxnad and Family Nails

I have a feeling this is going to be a long post, so here we go.

First off, does anyone remember the Design-a-Nail by Dee? I got it for Christmas from my parents years ago, and I don't even think they make them anymore. It basically was Konad stamping, only you used a machine with it. You pushed down, pulled the piece closer to scrape the excess polish, pushed the stamper down, picked it up, and pushed it directly onto your nail, which sat snugly on top of the curves of the machine. Sounds complicated, I know. I haven't used it in years, but since I've been reading all these blogs, I wanted to try it again, but I just used the plates it came with, the special polishes, scraper and stamper. Turned out my scraper was absolutely useless, and nothing else seemed to work, so I ordered both a scraper and stamper set and the 21 Bundle Monster plates from amazon.com. The plates were $17 and no charge for shipping! I placed the orders on the 21st of July, the stamper arrived on the 24th and the plates, on the 26th.

P1040345

P1040344


As soon as I got my new scraper and stamper, but before my new plates came in, I did my mom's nails in 2 coats of Wet and Wild's Wet Shine "Sunny Side Up" with one layer of Savvy in "French White White" as a base. Then I . . . fauxnaded. . . them using a plate from the Design-a-Nail system, 52M, and a Design-a-Nail special polish in "Rage." I love how it looks, and she was excited to be a hand model.

P1040326

P1040327

P1040330


I love it and I think this was my first full manicure I've ever done using any kind of stamping system, and it was so fun! Her nails are soo long, and she actually just trimmed them. I owe my good nail genes to her!

My sister, on the other hand, can't really grow her nails long, so I guess she got my dad's nail genes, lol. Earlier this week I asked her to let me paint her nails in periwinkle, her favorite color. I also got to use my new-ish dotting tool =]

Super blurry for some reason...
P1040314

P1040309

P1040315


And I used. . . P1040325

L.A. Colors Color Craze in Static Electricity, An old unnamed Petites polish that's a periwinkle with a purple flash, a Stripe Right in Gold (that's the name, but it's actually one of those amazing colors right between metallic gold and metallic silver), and a dotting tool/nail brush from Sally's.

Of course, this manicure bit the dust the next day when she went to the beach. She polished them again herself and I begged her to let me put some fauxnad on them, but she won't let me yet. Oh well =p

I'm going to end this here to avoid a super long post. Thanks for reading!

Janna