06 July 2012

Sephora + Pantone Universe Collector's Edition Set: Tangerine Tango

Hey hey!

Today I'm bringing you my latest obsession: the Sephora + Pantone Universe Collector's Edition Set in 2012's Color of the Year, Tangerine Tango. Oh my goodness this is awesome.

So Tuesday, July 3rd was my fourth dating anniversary with my boyfriend. Since he usually gets me polish, I told him to let me make some suggestions as to what I wanted instead of him going in blind to look for himself. I sent him the link of this on the Sephora site and didn't get to send him anything else because I couldn't make up my mind as to what Illamasqua polishes I want =P

Then, on Tuesday, I thought I'd have to feign shock as I opened up one of my gifts since I knew what it was, but I really was shocked because this thing is huge! Here's a picture. It's 14 x 8 inches for reference.


Seriously? This thing is gorgeous. And all of the individual pieces are huge as well! I thought that since this was a set the components would be small-ish, but these are huge even for individual pieces.

The inside:

Taken from the Sephora website:

This set contains: - 0.02 oz Color of the Year Eyeliner in Tangerine Tango Twist
- 0.31 oz Color of the Year Eyeshadow Quad
- 0.35 oz Color of the Year Prisma Chrome Blush
- 0.38 oz Color of the Year Blush Duo
- 0.1 oz Color of the Year Créme Lipstick
- 0.17 oz Color of the Year Lip Gloss


Six pieces for $48. Can you beat that? These pieces retail for $118! Let's take a closer look!


Super blurry picture of the eyeliner. My camera did NOT want to focus on it. But it's a really soft point that writes very easily and twists up. I'd say it's a true Tangerine Tango shade - a very red-orange - that isn't as coral as the other pieces of the set. The name on the liner is "Tangerine Tango Twist." It has microglitter in it that is barely noticeable but flickers when you move; the particles are so small that it reads as a shimmer. Love this and can't wait to rock it on my upper lash line!


Um, yeah, this quad is gigantic. The frosted top of this attaches by the four magnets that you can see at the corners. They are super strong, maybe even too strong (you really have to pull to get it to come off), and you definitely do not have to worry about it coming off accidentally. They 'snap' fiercely into place. The cool thing about this closure is that you can also twist the top to expose the shadows and have it attached by just two adjacent magnets. Clockwise, these shades are Carnelian, Scallop Shell, Sparrow, and Pavement. They're all shimmery, Carnelian with coordinating shimmer, Sparrow with magenta shimmer, and Scallop Shell and Pavement both with multi-colored shimmer. Love.


Next up is the Prisma Chrome blush. I've seen tons of raves about this product, and it's super pretty, especially the 3D design. This color is called Apricot Brandy and it's a peach with gold, orange, and perhaps green microglitter. Again, they are glitter specks that you can pick out, but the blush reads as a shimmer. I found the packaging a little hard to open at first, but like the other pieces, it's definitely secure and won't open unless you want it to. Love it.


Here's the lovely blush duo, featuring Desert Flower and Coral. Desert Flower has mostly a flat finish with very sparse shimmer particles and Coral features the same shimmer/glitter as in Apricot Brandy: gold, orange, and green. This duo has the same strong magnetic closure as the eye quad. Again, how huge is this? 


Here's the gloss! The shade is Tangerine Tango Luminous and it's a light-medium orange with a red undertone and some orange, pink, and gold microglitter. Despite the name I wouldn't say this is a true Tangerine Tango shade as it's not dark or red enough, but it's still really nice. Note the unique, flexible applicator! This shade is pretty but I'm not sure if I'm sold on how sparkly it is. In my experience, even after the gloss is gone, your lips are still sparkling. Oh, another thing: this gloss has an almost fruity scent to it and no taste. 


Next up is the lovely lipstick in Tangerine Tango Cream. Unlike the lipgloss, this is the true TT color: a deep red-orange. This has the same fruity scent as the gloss and I love the ridges in the bullet. Another awesome thing about this lipstick is the magnetic closure; you can hear it click shut as the pieces attach, so it's really secure and the cap won't come off in your purse (cough experience). Very pretty and bright. Can't wait to wear it!


Finally, here are just two swatches: the gloss and eyeliner. Imagine the gloss swatch (top) a bit more of a true orange; it photographed a little too coral and too bright. Oh, and don't mind my translucent skin. I'm an NC 15/20ish for reference.


So yeah, I'm obsessed with this and keep opening it up to play and swatch. I didn't do formal swatches of the shadows or blushes but i did apply a bit to my fingers and rest assured that these are pigmented. I can't wait until there are more colors of the year so I can have more collector's sets! They're still available as of today on sephora.com if you're interested! I highly recommend if you don't mind shimmer.


The only negative thing I can think of, and it's just a technicality, is that the orange pieces of this set are not all true Tangerine Tango shades, but I can understand that that shade is not as flattering or wearable for all skin tones, and the coral/apricot/carnelian derivatives are much less obnoxious. That being said, I love that they all aren't true TT shades; it gives variety and compliments the shade instead of the user drowning in it. I just had to think of a negative so this post has some authenticity =P It's only a negative thing if you want to drown in it.


PS. My nails in this post are my berry ombre from yesterday!


Do you have anything from the Sephora + Pantone Universe line? And another important question: When you have collector's sets or LE pieces, do you hoard them and leave them pristine, or use them? I'd love to hear!


Thank you so much for reading! What do you think of this set?


Janna

05 July 2012

Berry Ombre Manicure

Hello!

I'm back today with a Clever and Colorful first: an ombre manicure. Ever since I started my blog in July 2010, I've wanted to try an ombre manicure. For some reason, I found them incredibly intimidating because I never thought I could create the perfect fade on my nails and I'm super picky.

But on Tuesday, when I was looking for a pretty berry color to compliment my beige dress and printed shoes, I pulled out OPI Ate Berries in the Canaries and then a bunch of other berries and reds from the OPI Colección de España and I put together a little group. I could have probably used other polishes to make a smoother fade but I decided to stick to all the same collection for some consistency.


Thumb: Pink Flamenco
Pointer: Ate Berries in the Canaries
Middle: Mix of Pamplona Purple, Ate Berries in the Canaries, and No Spain No Gain
Ring: No Spain No Gain
Pinky: Manicurist of Seville


The middle finger started out as just Pamplona Purple but it looked more like a skittles mani than an ombre so I mixed one. I'm really liking this look and it's fun to wear different shades on your nails! I can't believe I waited so long to try it..it's definitely not as hard as I thought!

So how about you? Have you tried an ombre manicure?

Thanks for reading!

Janna

04 July 2012

Celebrating!

Hello! Happy Fourth to my American readers! And happy hump day to my non-American readers =]

This year for the fourth of July I didn't do my nails because I had just done them the day before to celebrate my dating anniversary with my boyfriend, and I wasn't ready to get rid of that manicure yet (I'll post that tomorrow). So nail blogger fail.

But I did do something fancy to my hair using my hair chalking tutorial to celebrate this holiday. Take a look:


Red and blue hair! I thought this looked really cute =] And my nails are my berry ombre that I said i'll post about tomorrow.


So I hope everyone had a great day! I spent mine with family eating great food and watching fireworks! How did you celebrate the fourth or spend your Wednesday?

Thanks for reading,
Janna

29 June 2012

OPI San Tan-tonio

Helloooo.

Just a short, late-night post for you guys. Here is OPI San Tan-tonio. At first glance, this polish seems rather plain or boring, but it's a really pretty neutral and a great mannequin hands or underwear shade for your collection. It's a bit darker than my skin tone, but each time I paint my nails with this shade it's like painting my nails with "skin out"....like white out but in a skin tone shade. For reference, I'd say I'm like an NC 15 normally, probably NC 20 right now for reference, so if you fall in that range or darker I'd say this would be a great nude shade for you!

This is two coats. It definitely could have been one coat but my pressure was a little uneven, so the color was a little thin in spots.

closest to real life!


So that's San Tan-tonio! Do you have this polish? What's your favorite mannequin-hands shade?

Thanks for reading =]

Janna

28 June 2012

Some Sally Hansen HDs!

Hey everyone! This post is scheduled because I'm away for the day....hopefully it posts.


Anyway, here's something quick to show you. These Sally Hansen HD polishes were at Five Below, advertised as 2 for $3. So needless to say, I got six. I'll show you all six even though my pictures aren't the greatest.


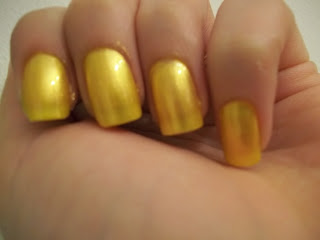
This is Lite, a standard yellow shimmer. Rather sheer and very shimmery. This was four coats.

This is Digital, a coolish pink shimmer. This was is also pretty sheer but a nice color if you don't have anything like it. Shown is 3 coats.

Hi-Def, a light, yellow-green shimmer. This one is rather unique for this collection, but sheer. This is also 3 coats.

Up next is Cyber, a really striking deep purple shimmer. This one is a bit more opaque, needing 2-3 coats. I really liked this one as I don't have many purples.

Here's Pixel Pretty, which I only got because I needed a 6th polish. Your run-of-the-mill turquoise shimmer, related to OPI Austin-tatious Turquoise and $OPI Who Let the Dorks Out. It's pretty if you don't have anything like it I guess. 3 coats.

And finally, the most unique and prettiest of the collection if I do say so myself, BLU. And blue it is. It's a rich shimmery cobalt that was very opaque. 2-3 coats needed. Really worth getting if you like blue!

My camera is awful. Anyway, last time I was at Five Below, these were still there, so take a look if you're interested. Do you have any HD polishes? I feel like this line was sort of a bust...

Thanks for reading!

Janna

27 June 2012

Rainbow Glitter!


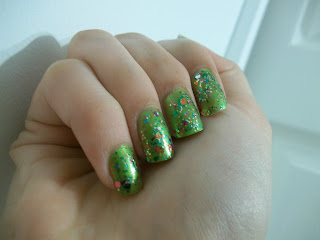
Hey everyone! This is a quick post because I'm going with my boyfriend's brother to his college orientation tomorrow! Here's one from the vault. The bright lime green polish is from Icing and since I'm not home, I don't have the name handy. (EDIT: It's Icing's Absinthe.) But you wouldn't want this polish anyway; it was streaky and sheer. It's topped with OPI Rainbow Connection though, so that makes it better.


That's all for now. Sorry for the short post! Thanks for reading!

Janna

26 June 2012

Rainbow Hair - Hair Chalking 101!

Hey everyone!

I'm so so excited to give you this post today. I can already tell it's going to be a little long-winded so bear with me as I ramble (or just scroll down and ignore me). And I'm gonna say this now so I don't have to repeat myself: All pictures are clickable, they're just little for the sake of saving space and my camera sucks and won't ever focus.

As you probably know, Pinterest (follow my personal account!) is a wonderful thing. One night several months ago, I was scrolling through and came across many pictures of hair with rainbow streaks. Anything multicolored really strikes me and I fell in love. Turned out that some of the pictures I was looking at weren't done with actual dye, but with CHALK! Soft chalk pastels, to be specific, and it's a really cute, temporary way to experiment with color, coordinate with an outfit, or try out a potential new color in your hair before you actually take the plunge (which is what I want to do...more in the P.S. at the end of the post!).

So here's what you need:

  • A box of pastels (these were lovingly stolen from my sister, but can be found at Michael's, any other craft store, or online) NOTE: products can be found online that are actually marketed as "hair chalk," but they are at least twice the price and I'm sure that these are basically the same thing! Don't be fooled.


  • Water (pretty much everywhere, fo' free)
  • Gloves (optional...I didn't use them)
  • A sheet of paper (optional...I didn't use this either)
  • ...Hair? ...Hands? (Those are the easy ones)


Okay, so there are two techniques to applying these chalks to your hair.

Step 1: Grab a strand of hair, be it part of your bangs, a small piece underneath, or a large piece running the entire length of your hair. If you're brunette, soak this strand thoroughly. If you're blonde, I've read that you may not need to wet it to get color to appear, and that doing so can even stain the hair. However, I did a strand of my mom's blonde-from-a-box hair (sorry, mom) and I needed to wet it to get any color to show up. Experiment with this.


Step 2a: This is the first technique I learned. Grab said wet strand of hair and put it into your hand or down flat onto a piece of paper. Grab the pastel in the color of your choice and, going in ONE direction only, from the top of the strand going downward, color onto the hair. Going in two directions will mat the hair. Channel your inner 3 year old for this step.


Step 2b: This is a second technique that I used, and it is a bit more messy than the first (though whichever you choose, you will get your hands - or gloves - dirty). Wet the chalk pastel of your choice and color into your hand in a circle, creating a "pool" of the color. Using one finger, dip into the concentrated color and then onto the strand, transferring the pigment. NOTE: this created a much wetter piece of hair and will cause a longer dry time.


Making the pool...the top of the pastel
blends right into the pool
Dipping in the pool


Step 3: Continue with whatever pieces or colors you choose, rinsing your hands or changing your gloves from time to time as to not mix colors. When you're done, your hair will look something like this:


If it looks like a clumpy mess, you're doing it right.
Here, I used teal, red, orange, green-yellow, pink, and indigo pastels, to give some variety. The majority of the colors were done using technique 'a' while the indigo and the one tinyy strand of red that's showing up pink were done using 'b'.


I'm using a 1" Argan Heat One 'n' Only iron.
Also, white balance fail.
Step 4: Turn on your curling or flat iron. Wait until the strands have dried and then comb them through slightly using your fingers if they look like a hot mess, like most of mine did. Use your appliance on the hair to lock in the color and style as you wish! NOTE: The chalk will start to come off on your hands and appliance, but you can get it off easily. Adding hairspray may lock in the color better, but I haven't tried it yet.


Here's the finished product and I absolutely love it:

Gorgeous, right? Or do I look like a clown?


Here are some bonus pictures of my first attempt at this! I followed procedure 'a' exclusively and didn't use heat at all.

LOVE.

Wear time: I've done this twice to my hair now and both times, I slept with it in and the color lasted overnight, but then washed out in the shower. So this is just meant to be temporary.

Other notes, 'cause I just don't have enough:

  • It may stain things it comes in contact with, so don't blame me! It also comes off on your hands and appliances as I said.
  • After you wash this out, be sure to add extra conditioner to the spots you colored, since the chalk is drying.
  • I've read not to use actual sidewalk or chalkboard chalk because it's even more drying and less pigmented, in case anyone was curious. To repeat, these are 'soft chalk pastels' that you would use in an art class.


So that's about it. Let me know if my tutorial was clear and if not, I can try and clear some things up for you. There are a bunch of written and video tutorials on this technique throughout the interwebz so you should find your way just fine.

Please let me know if you try this! I'd love to see a picture or read any comments you have.


P.S. I'm really loving the look of this bright color and have been wanting to do something more permanent for a few months now. I'm thinking about bleaching the very tips of just some strands of hair throughout my head and using some brand of semipermanent color on them in a bright-but-not-neon pink, a light orange, a deep teal, and a very true purple, kind of creating the look of my first attempt but with a real purple (though I am really liking the rainbow...). Sort of dip-dying some strands. The problem is, I'm completely at a loss about what brand I should use! So if you have any recommendations, please let me know. I was leaning toward Special Effects, but now Manic Panic seems a little more appealing because it is more widely available. I was also unsure of whether or not I should bleach. I just want something that lasts!

Thank you guys so so much for reading! And special thanks to my sister who was my photographer and proofreader. Are you going to give hair chalking a try? Any feedback is appreciated.

Janna<3


25 June 2012

China Glaze Surfin' For Boys + Mash m78

Hello there! How's your Monday going? I'm going to take a minute to brag by saying I love being a college student on summer break who slept in today. =] You love me.

So, today I have for you what I consider a staple manicure for all nailheads: the neon/animal print combo manicure. Now, if you know me in real life, you know I'm not one for animal print at all; maybe it's something I've subconsciously rejected since it's so insanely popular with girls my age. It's a little loud for my tastes. But today I was looking at my China Glaze Surfin' For Boys manicure that I did yesterday and was looking to spice it up, so I started digging through my plates and found Mash m78, featuring a leopard/zebra combo stamp.


This is something out of my comfort zone, so I thought, but I love how obnoxious it is and can't stop staring! Stamping polish is Design-a-Nail Voodoo. This is not the best stamping job of my life because 1) I'm super out of practice and 2) I was working with a new stamper and scraper (more on that in a future post). Anyway, check it out:


So I ask you, have you ever done a manicure that you thought would be totally out of your comfort zone but ended up being really awesome? I'll have to find my m57 plate so I can do full on zebra or leopard; hopefully it'll come out of hiding soon! What do you think about this manicure or animal print in general?

Thanks for reading!

Janna