Yesterday I created my entry for Polish Hoarder Disorder's Vampire Challenge, and I submitted my entry this morning. I'll post those pictures tomorrow, on the challenge's deadline. But after I put those dark colors on my nails, I needed something bright, so I decided a rainbow colored water marble would be best! lol. Warning: lots of pictures ahead.
I'll walk you through how exactly I did it, and I'll put a link to the actual manicure pictures HERE. Almost everything I did I learned from Colette of My Simple Little Pleasures blog, along with a small bit from my own experience along the way. This is only my second water marble I've ever worn, but the third I've attempted. So this is how I did it!
Polishes used:
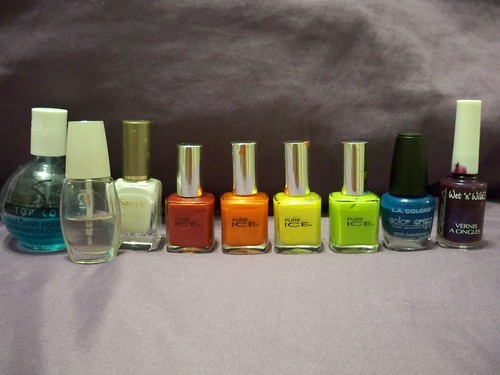
I'll name these polishes as I mention them in my directions.
You'll also need lots of toothpicks (I must use at least 20 per manicure), Scotch tape or vegetable oil, scissors, paper towels, a cup, and water.
Step One: Apply a base coat (I used Avon Smooth Beginnings) and 1-2 coats of a base color to your nails. I chose white since I had so many colors going on, and I used two coats of Savvy Nail Color in French White White. Let dry completely.
Step Two: Fill a small cup with water.
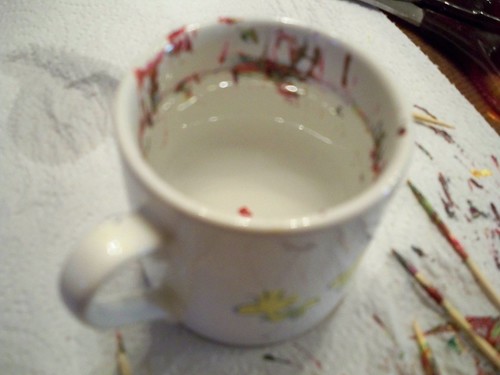
I actually used to drink out of this cup as a toddler, so that gives you an idea of how small it is. To fill the cup, I run filtered water out of my tap into a Pyrex measuring cup and then heat it in the microwave for about 20 seconds, just to take the chill off. If I fill the Pyrex cup to the top, I just leave it out on my table after heating so I can easily change the water without having to run the sink again, since the cup I use is so small (I usually change the water I'm using after every 2 or 3 nails). NOTE: make sure you don't use anything that's too good, because the cup will be a mess after water marbling.
After the cup is filled. . .
Step Three: Tape off your finger with Scotch tape.
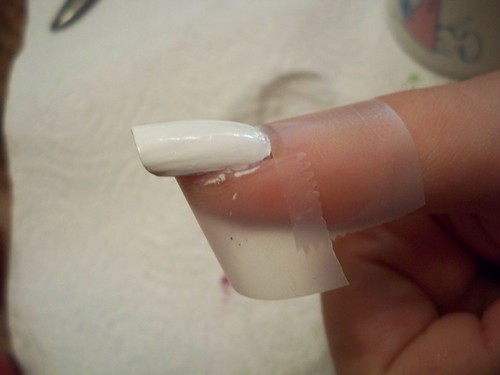
I followed Colette's YouTube video exactly for this step. Some people choose to coat the skin around the nail with oil, but I'd rather just tape it off. This is to protect your whole finger from being covered in nail polish.
Step Four: Open all your polish bottles, and one by one, in whichever order you choose, drip them into the water so that they start to spread out.
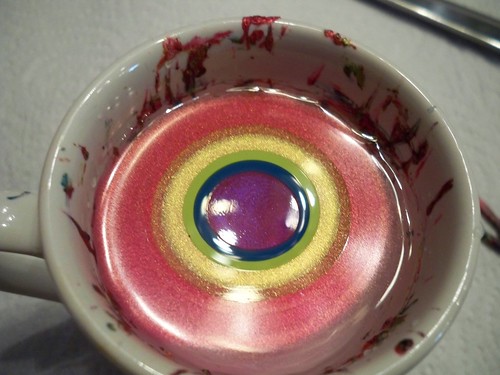
I chose to drop red first, followed by orange, yellow, green, blue, and purple, for no reason other than that's what I felt like doing. The red, orange, yellow, and green are all Pure Ice polishes, and are Crimson, Hot Tamale, Excuse Me, and Wild Thing, respectively. The blue is L.A. Colors Static Electricity and the purple is an old Wet n Wild in 417E. I suggest playing around with the colors before starting, as some polishes won't spread well, some will dry super fast, and others will just drop to the bottom of the cup. The farther the color spreads, the more sheer it will be, and this is why I use a small cup; the color doesn't have as far to go, so I get a relatively opaque color on my nail. (I tried the smaller cup after the first time I marbled, because I hated how sheer the colors were on my nails when I used a larger cup.)
Step Five: With a toothpick, pin, orange stick, or really anything with a thin point, swirl the colors around to make the desired design.
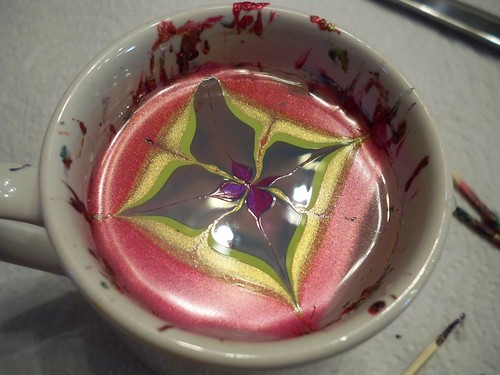
I chose to do four lines to the center and four lines away from the center, and I really only picked that because it was the easiest way for me to fit all the colors on my nails without the colors blending together. NOTE: When marbling, you have tp work fast so the polishes don't dry on top of the water. If they do, you won't be able to drag the colors and make a pretty design. =] Instead, the polish will just stick to your toothpick and you'll have to start over.
Step Six: Find a spot of your design that you like, and press your taped-off nail into that part of the design. Then, clean up the excess polish with a toothpick.
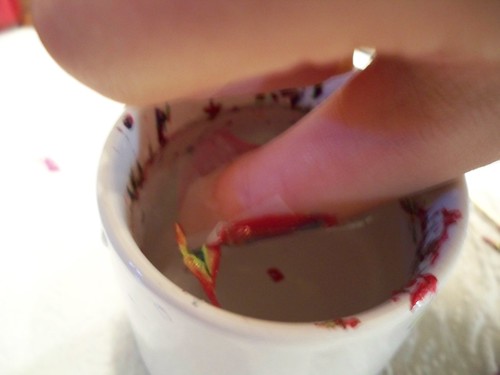
(this one's blurry, sorry. I took it with my left hand =p)
I think for this one I aimed for the bottom part of the design, and the right side of the little "petal." On all of my nails, I aimed the red part toward the tip and the purple near my cuticle, and I got nice lines of each color on my nails. After you dip your nail, the excess polish will most likely be dry. Dipping your toothpick in will cause the dry polish to stick right to the toothpick, making for an easy cleanup. Also, you could dip two nails at once, but since I'm a perfectionist, I prefer to just do one so I can get the nail exactly where I want it. Plus, this design is not easy to do with two nails.
Step Seven: After the excess polish is cleaned up, remove your finger from the water and remove tape.

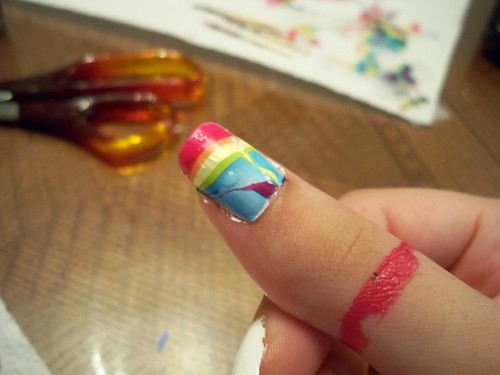
Now you can definitely see how helpful that tape was! So there you have your design, and now all you have to do is clean up the stray polish with a Q-tip or brush dipped in nail polish remover. Also, if I find that one section of color is really sheer, I'll go back over that section with a small nail art brush dipped in that color. For example in the picture above, you can see that the yellow is pretty sheer, so I dipped my brush in the yellow polish and basically "colored in" the yellow part darker. This is completely optional though; hopefully your design will come out perfect without this!
So then I just topped it with my go-to topcoat, Beauty Secrets.
Here are some bonus pictures:
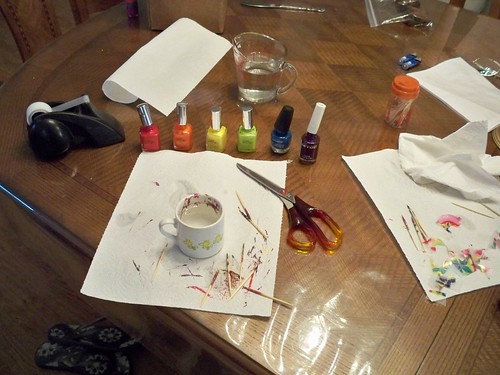
My workstation
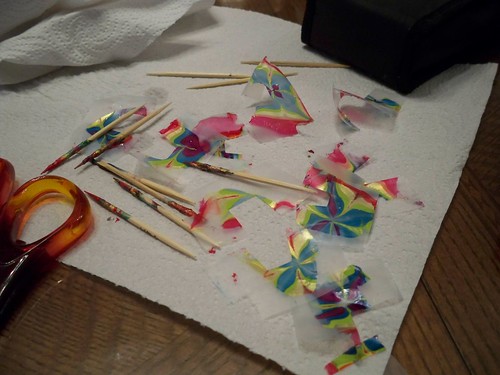
Even the trash is pretty! =P
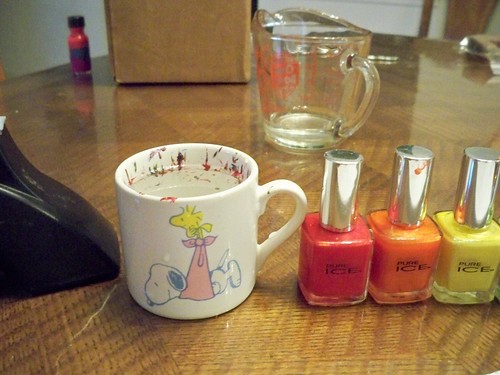
This shows how small (and adorable) that cup is =]
(And yes, that is a Hot Topic polish in the background of that last picture; my sister gave it to me today, and I'll swatch it at a later date!)
So, here's the look pre-topcoat, and even pre-cleanup. For pictures of this finished manicure, like I said earlier, click HERE.
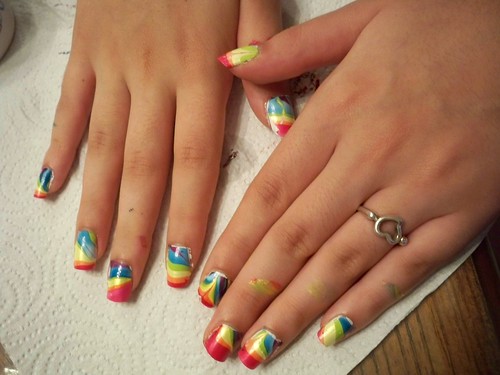
Please give this a try! It takes practice, but once you get the hang of it, it gets easier. Plus the results are awesome!
Thank you for reading this incredibly long entry, and special thanks to my 7 followers =]
Have a great day,
Janna
Very pretty! I've never tried water marbling before because it's such a time-consuming process, but I will at some point. Every time I see a pretty water-marble manicure like yours, I get up a little more courage, haha. :)
ReplyDeleteim gonna try it, really beatiful, just like candies!!
ReplyDeleteThank you! I'm still wearing it I love it so much!
ReplyDeleteWow that is really cool, I saw my friends results after seeing this and she didn't get such great results to say the least! lol I guess she will have to practice.
ReplyDeleteThank you =] It definitely takes practice and patience, and a tiny bit of luck, lol. Hope my tips help!
ReplyDeleteah they look so pretty
ReplyDeleteI was commenting on another forum and found your link. I love it!! I usually do similarly colored nails. Boring pink and white aren't really my thing.
ReplyDeleteThis technique is WONDERFUL on paper and fabric. You have to use different paint. It makes the best personalized cards and quilt fabric. I suggest testing your swirling techniques with cheaper paint and papers before frustrating yourselves and wasting precious nailpolish.
I also found that a lot of the cheaper $2 drugstore polishes work way better than designers. For marbling and normal painting/ designing. Don't skimp on the base coat or top coat too much. Opi's pretty good.
I've seen a lot of people use cut off plastic or styro cups, so you can just toss them if things get too messy.
Press and seal plastic wrap works GREAT for protecting your work surface from becoming rainbow.
Thanks for the ideas =D
ReplyDeleteI love the colours you've used in this! Will definitely be trying it out as it looks spectacular!
ReplyDeleteThank you! I'm glad you're trying it!
ReplyDeleteI tried doing this tonight with KleanColor, China Glaze, Fingerpaint and Xtreamware nail polishes. I moved very quickly but the nail polishes wouldn't smear. They were already hard. What could be my problem? :( I really want to use this technique!
ReplyDeleteAnonymous - I'm sorry you didn't have much luck! I would make sure you're using warm enough water first of all. Then, make sure your polishes are open so you can move as fast as possible. How many different polishes were you using? If none of these tips work I would suggest trying fewer or different polishes.
ReplyDelete