Showing posts with label water marble. Show all posts

26 May 2012

Summer Water Marble!

Helloooo.

As you could have probably noticed, my semester was rough. From mid-February to the end of April I was literally swamped, and then I turned 21 on April 23rd, so I had to go out and celebrate with my friends, of course!

Here's a mani that is epic enough to make up for my 3 month absence (....wow, that's a big claim). I had just gotten home from school when I did this - so, maybe a week and a half ago - and wanted to do something intricate since I usually just slap on polish during the school year and leave it there for a week so it ends up just about as chipped as can be and then I repeat the cycle.

I started with a base of Savvy French White White (not a typo!) and then water marbled with Sally Hansen Lightening (yellow cream), Wet n Wild Sunny Side Up (orange cream), Essie Olé Caliente (coral cream), and OPI Pink Flamenco (berry pink cream) using random dragging motions. The colors came out much brighter than I expected! I also got compliments and/or questions about how I did it from a ton of people, including my male relatives. I loved it and was sad to take it off!

Left hand! Sorry for the horrid lighting.
Anddd the right!

SO BRIGHT!

Mhm.

So my pictures aren't that great but hopefully you get the gist.

And if you'd like, check out my tutorial HERE and my past water marbles using the water marble tag on my blog and this post, a link to which I've conveniently provided for you HERE! You're welcome.

Thanks for reading!

Janna

29 June 2011

Pink Wednesday - A Motherly Water Marble

Hi there!

While you read this I am off galavanting in NYC. Sigh =] Or still asleep.

For this week's pink Wednesday, I actually have a pink. Yesterday you saw my sister's graduation water marble, and today I'm going to show you how I did my mom's nails.

My mom showed me a magenta-colored top that she was wearing for my sister's graduation, and OPI Ate Berries in the Canaries was a near-perfect match, so first I painted all of her nails with that. Then I practically had to beg her to let me water marble them...she said she didn't want me to mess them up =P I chose to do a relatively simple design on her because she didn't want her nails as crazy as mine and my sister's.

This is a really simple way to try a water marble if you're a little scared. I only did her thumbs and ring fingers, and they made a really nice accent to her manicure, if I do say so myself =P The accent nails are marbled with Ate Berries in the Canaries and Pamplona Purple (I could have used a clear polish instead of ABITC because her nails were already painted with that color, but I didn't have a clear polish handy). My mom really liked it! =]


This is entitled, "Jan, my arms don't bend that way!!"


I made these pictures extra large so I hope you can see the design. It's pretty subtle but she got a lot of compliments on it =] Every design came out perfect though, so any imperfections you see are the fault of my photography. Maybe next time we'll go bolder...

So what do you think? Does this make you less scared to try a marble? =]

Have a great Wednesday! Thanks for reading!
Janna

28 June 2011

More Water Marbling, Family Style

Hello!

How is everyone doing today? I just wanted to preface this post by saying that I'll be spending Tuesday night to Wednesday night in New York City! It's the first time I'm going without being on a field trip!

Also, I'll be picking my giveaway winner on Thursday when I return. I cannot wait! Thank you for your patience! =]

So my last post was about my MAC Hint Of Sapphire water marble. The day before I did that water marble, I did my sister's nails and some of my mother's nails in a water marble design as well. Today, I'm going to show you my sister's design.

This was an extra special design because my sister graduated high school on Monday, and I did this design for her on Sunday night. So congrats to her!

For her marble, I used Color Club Age of Aquarius, China Glaze Spontaneous, OPI Ink, and Orly It's Up to Blue. It was a pretty combination =] Take a look! EDIT: Forgot to mention I topped them with Cover Girl City Lights, a holo topper.


left.


right.


What do you think? Have I inspired you to try a water marble yet? =] To all my new followers, look HERE to see how to do it!

Thank you for reading!

Janna

24 June 2011

MAC Hint of Sapphire-Inspired Water Marble

Hi everybody!

I'm bursting with excitement right now to share this manicure! It's been in my head for weeks and I'm really happy with the way it turned out!

If you keep up with cosmetics, you may already know that MAC's summer collection, due out in July, is called Semi-Precious and will feature mineralize blushes, mineralize skin finishes, cream sheen glasses, and other products. What really caught my attention, however, was the mineralize eyeshadows. (Check out beautezine.com's post of the full press release of the Semi-Precious collection from MAC.)

Now, I don't know too much about MAC and the only MAC products I have were a gift, so I'm not going to pretend I know the difference between a creamsheen glass and a lustreglass (if you know, please share!), but these eyeshadows look just plain gorgeous in the pan. I mean, how could you stand to use them?! The colors swirl together beautifully and compliment each other to a T, and there are some really unique color combinations in this collection.

So when I saw the press release for the Semi-Precious collection on several beauty blogs and I saw the eyeshadows, I was reminded of watermarbled designs for nails. The eyeshadow that stuck out the most to me was Hint of Sapphire. Here's a look:

Image Credit:  beautezine.com.

Seriously beautiful. These things are truly a work of art. So I let my creativity flow and set out to create a water marble that utilized the colors in this particular eyeshadow. MAC describes Hint of Sapphire as a "melange of pink, violet, teal, copper, blue." Respectively, I used Zoya Perrie (even though Zoya describes Perrie as purple), China Glaze Spontaneous, Color Club Age of Aquarius (on loan from my sister), Pure Ice Iced Copper, and Sally Hansen Blue It. The combination is awesome! Take a look =]


Left Hand


Right Hand


Left


Right


My favorite nails:

Left Index


Left Pinky.


Right Ring


Before you can say it, I did go overboard on the pictures. I wanted to do this manicure justice and I think I did =] And pardon my shoddy cleanup job.

The contrast of all these colors really pops on my nails, and in my opinion the copper just makes this look. And, if you're wondering how I did this, click HERE for my tutorial on how to water marble!

I'd like to do another watermarble based on one of the other shadows from this collection, but I'm not sure which one. I was leaning toward another multi-colored one, but do you have a preference? Let me know!

Swatches of this collection are starting to circulate, so tell me, are you getting anything from the Semi-Precious collection? Any eyeshadows? If you are, would you actually use them? =P What do you think of this manicure?

Thanks to Jessica of beautezine.com for letting me use her picture of Hint of Sapphire! =]


Thanks so much for reading!

Janna

05 August 2010

My Semi-Fail POTW

I hate painting my toes, and I usually wear pedis for about 2 or even 3 weeks if the polish doesn't chip too badly, but this one is coming off very very soon. I did this a couple of days ago because I wanted to use China Glaze Yellow Polka Dot Bikini =] But I pretty much hate how it turned out.

First off, Sally Hansen Blue Me Away! stained SO SO SO bad. I've never experienced anything like that before andddd I used a base coat. Then, my Savvy French White White that I used under YPDB was streaking and leaving bald spots, and YPDB was kinda runny and hard to control. . . and then I topped it off with an ugly fauxnad stamp =p

So here you go. Have a couple of laughs. What cleanup I could do is absolutely terrible, and sorry for the crappy picture =p I didn't even want to post this lol.


This is tons brighter in real life, and I took a flash picture that showed the true color but the "paint job" looked even worse.

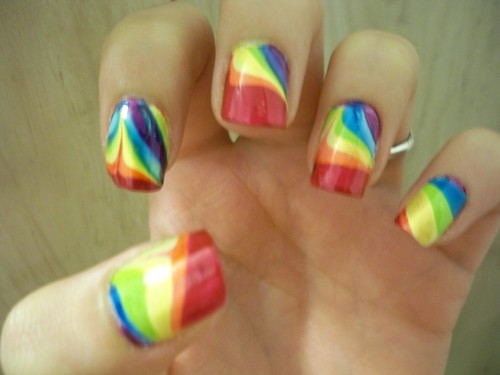
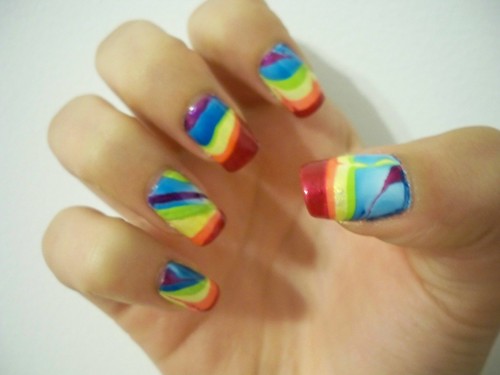
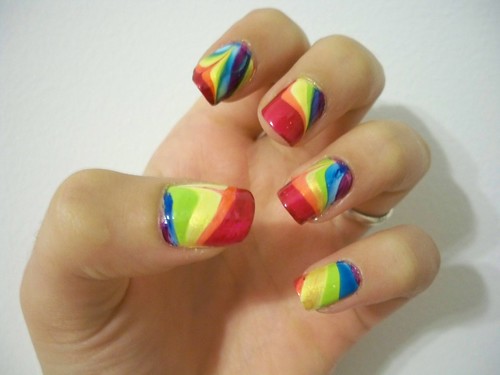
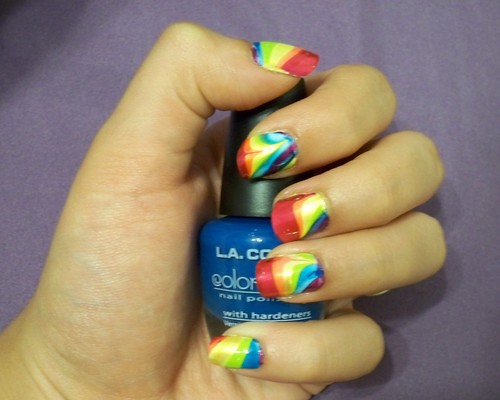
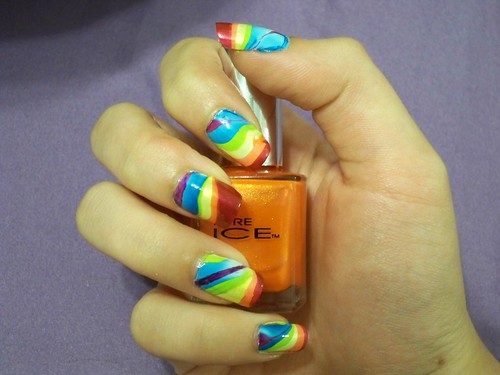
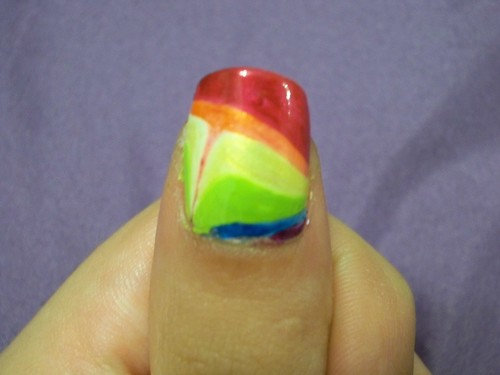
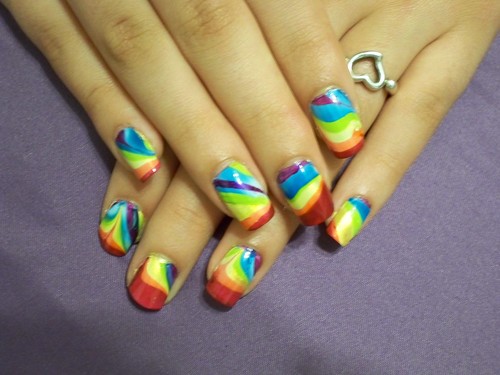
In other news, I'm STILL wearing my rainbow water marble. I think it's been a week and I am so unbearably sad whenever I think about taking if off. But hey, if I spent all that time and polish doing it, why not wear it for as long as possible? I did add two coats of my newly purchased (for $1.99) ChG Golden Enchantment (gold holo glitter) and have done many touchups on the red. Quick pic:


So that's all I have for you today. Check back tomorrow; I'll be taking off my rainbow water marble (=\) so I can work on my entry for Polish Hoarder Disorder's Nature Challenge (=]). Bittersweet, but it's time to change my polish anyway. It's starting to peel from the bottom, which is the most annoying thing in the world. =]

Thank you for reading!

Janna

29 July 2010

My Three Water Marbling Attempts

So this is basically a follow up to my last post, How to Water Marble.

I first got into water marbling a little over a month ago. I had heard about it for a super long time, but I never looked into it or knew how it was done.

My first attempt was on July 2nd I believe. I tried to do a red, white, and blue manicure for the 4th of July, and it was a disaster. Sometimes the polishes would drop to the bottom, but sometimes they'd spread nicely, and other times the colors would all blend together and make a purple color, which definitely wasn't what I was going for. Looking back, I should have started with something easy, but that's never my nature =P

So I did my first nail and decided it came out pretty good. Then I did another nail and decided that that one looked soooo much better than the first, and that I should redo the first one. I had only had 4 nails finished and each had been done twice when I finally stopped. This was probably because I hated how different each nail looked, even though to some, that's part of the fun of it lol. I kept taking the polish off after deciding I didn't like it, and then I got too frustrated to keep going. My nails ended up neon orange for the fourth of July instead.

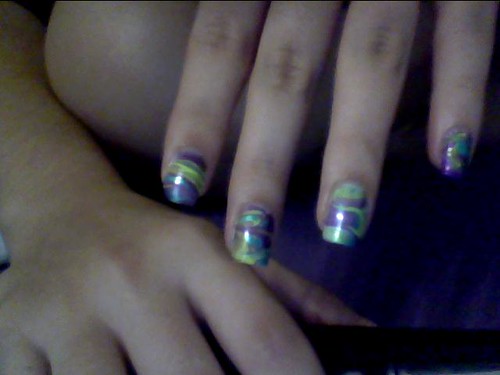
A week or so later I decided to try again. My two favorite colors are light green and purple, so I did a green, blue, and purple water marble, which I thought was a really pretty color scheme. I didn't really try any special design for this one, just a couple lines in opposite directions, but it came out pretty decently.

For this I used Savvy's French White White as my base, and for marbling I used Pure Ice Wild Thing, Wet n Wild Caribbean Frost (a turquoise color), and China Glaze Coconut Kiss. I hadn't thought of starting a blog at that point, or even taking pictures of my nails, so what you're seeing here are pictures I took with my webcam so that I could show them to friends I don't see often.

Sorry about the poor quality.

Photo_00053
Right hand

Photo_00051
Left hand

Photo_00052
Thumbs


This took probably two hours to do, which sounds like a really long time, and I guess it is. The polish cooperated most of the time and I had to redo a couple nails, but it was a much better experience than my first try.

I thought it was pretty good for one of my first attempts, and I got soooo many compliments on them. It was crazy. I feel like I had to explain water marbling a hundred times to everyone that said, "YOU did that? YOURSELF? How?!"

I wore those for at least 10 days, with chips here and there that I touched up, and I kept adding coats of topcoat. I finally took the polish off after I was done a week of volunteering; three of my nails broke and the chipping got really bad.

So I was finally ready to do it again. Step by step instructions and the polishes I used are included in the How to Water Marble post (another link for convenience).

I took a TON of pictures of these. It was so easy! The polish cooperated every single time and I didn't redo a single nail! Pretty good right?!

100_0117

100_0115

100_0120

100_0118

100_0129

100_0132

100_0133
Left Thumb

100_0136
Right Thumb

100_0137

100_0140


I love them! (Can't you tell? I have enough pictures =P) My favorite nails are my left index finger and ring finger, and my right pinky. I still can't believe how easy this was =] I'd say this took me about an hour to an hour and fifteen minutes, not counting cleanup, dipping each nail by itself (and I was taking my merry old time).

I had tons of fun with this! Please give it a try if you haven't already =]

Thank you so much for reading! I hope you enjoyed looking at my nails as much as I do! =P

Janna

How to Water Marble

Hello again!

Yesterday I created my entry for Polish Hoarder Disorder's Vampire Challenge, and I submitted my entry this morning. I'll post those pictures tomorrow, on the challenge's deadline. But after I put those dark colors on my nails, I needed something bright, so I decided a rainbow colored water marble would be best! lol. Warning: lots of pictures ahead.

I'll walk you through how exactly I did it, and I'll put a link to the actual manicure pictures HERE. Almost everything I did I learned from Colette of My Simple Little Pleasures blog, along with a small bit from my own experience along the way. This is only my second water marble I've ever worn, but the third I've attempted. So this is how I did it!

Polishes used:
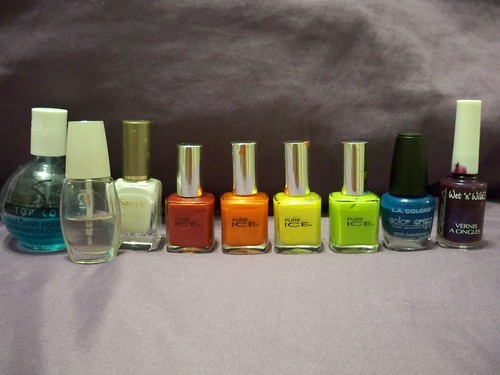
100_0144

I'll name these polishes as I mention them in my directions.

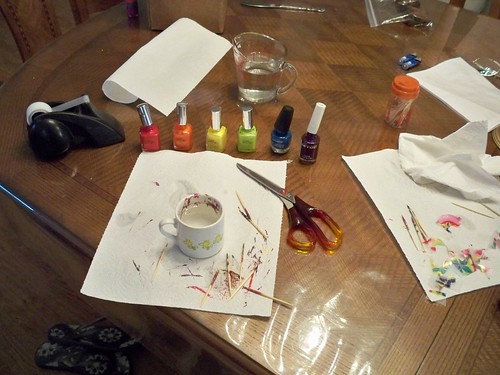
You'll also need lots of toothpicks (I must use at least 20 per manicure), Scotch tape or vegetable oil, scissors, paper towels, a cup, and water.


Step One: Apply a base coat (I used Avon Smooth Beginnings) and 1-2 coats of a base color to your nails. I chose white since I had so many colors going on, and I used two coats of Savvy Nail Color in French White White. Let dry completely.

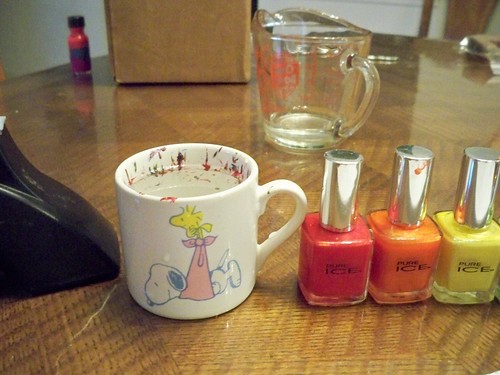
Step Two: Fill a small cup with water.
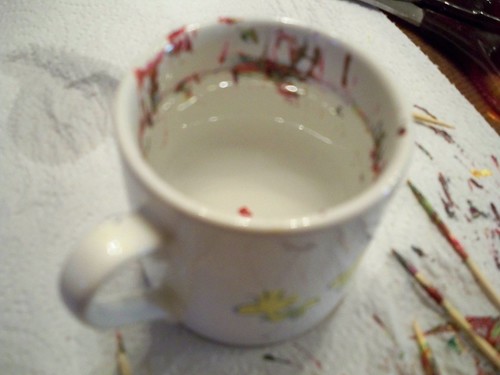
100_0082


I actually used to drink out of this cup as a toddler, so that gives you an idea of how small it is. To fill the cup, I run filtered water out of my tap into a Pyrex measuring cup and then heat it in the microwave for about 20 seconds, just to take the chill off. If I fill the Pyrex cup to the top, I just leave it out on my table after heating so I can easily change the water without having to run the sink again, since the cup I use is so small (I usually change the water I'm using after every 2 or 3 nails). NOTE: make sure you don't use anything that's too good, because the cup will be a mess after water marbling.
After the cup is filled. . .

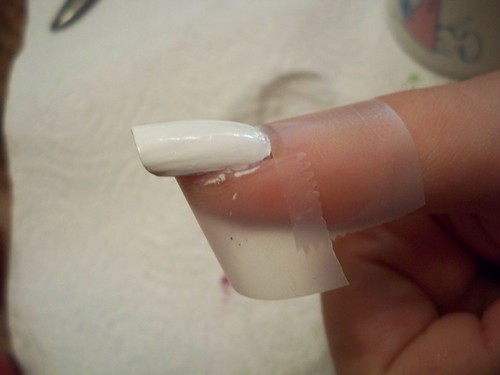
Step Three: Tape off your finger with Scotch tape.
100_0094


I followed Colette's YouTube video exactly for this step. Some people choose to coat the skin around the nail with oil, but I'd rather just tape it off. This is to protect your whole finger from being covered in nail polish.

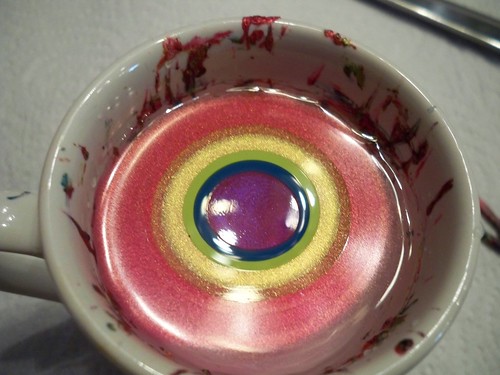
Step Four: Open all your polish bottles, and one by one, in whichever order you choose, drip them into the water so that they start to spread out.
100_0095


I chose to drop red first, followed by orange, yellow, green, blue, and purple, for no reason other than that's what I felt like doing. The red, orange, yellow, and green are all Pure Ice polishes, and are Crimson, Hot Tamale, Excuse Me, and Wild Thing, respectively. The blue is L.A. Colors Static Electricity and the purple is an old Wet n Wild in 417E. I suggest playing around with the colors before starting, as some polishes won't spread well, some will dry super fast, and others will just drop to the bottom of the cup. The farther the color spreads, the more sheer it will be, and this is why I use a small cup; the color doesn't have as far to go, so I get a relatively opaque color on my nail. (I tried the smaller cup after the first time I marbled, because I hated how sheer the colors were on my nails when I used a larger cup.)

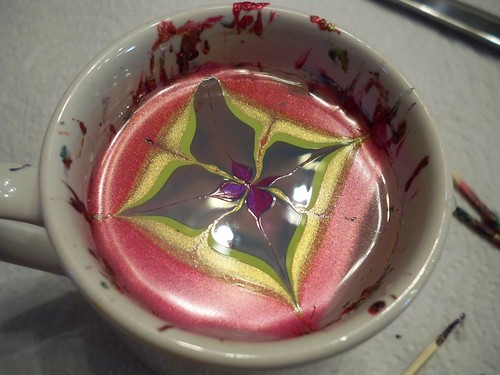
Step Five: With a toothpick, pin, orange stick, or really anything with a thin point, swirl the colors around to make the desired design.
100_0096


I chose to do four lines to the center and four lines away from the center, and I really only picked that because it was the easiest way for me to fit all the colors on my nails without the colors blending together. NOTE: When marbling, you have tp work fast so the polishes don't dry on top of the water. If they do, you won't be able to drag the colors and make a pretty design. =] Instead, the polish will just stick to your toothpick and you'll have to start over.

Step Six: Find a spot of your design that you like, and press your taped-off nail into that part of the design. Then, clean up the excess polish with a toothpick.
100_0097

(this one's blurry, sorry. I took it with my left hand =p)

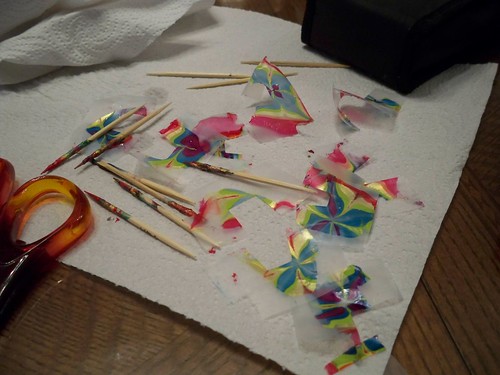
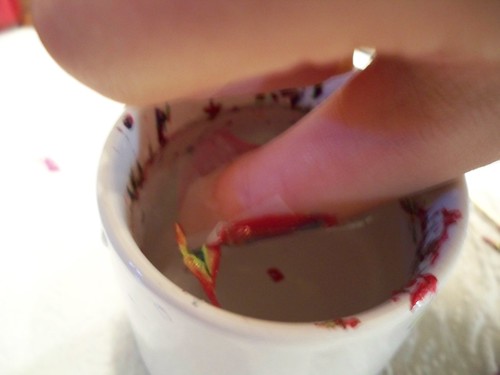
I think for this one I aimed for the bottom part of the design, and the right side of the little "petal." On all of my nails, I aimed the red part toward the tip and the purple near my cuticle, and I got nice lines of each color on my nails. After you dip your nail, the excess polish will most likely be dry. Dipping your toothpick in will cause the dry polish to stick right to the toothpick, making for an easy cleanup. Also, you could dip two nails at once, but since I'm a perfectionist, I prefer to just do one so I can get the nail exactly where I want it. Plus, this design is not easy to do with two nails.

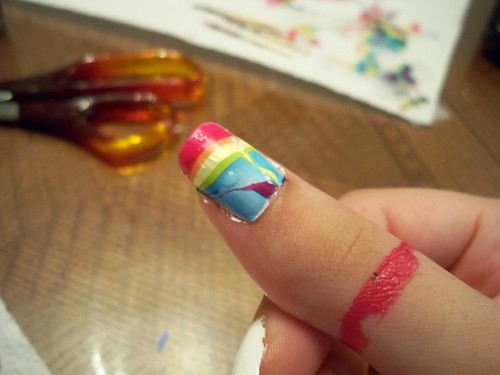
Step Seven: After the excess polish is cleaned up, remove your finger from the water and remove tape.
100_0098
100_0100


Now you can definitely see how helpful that tape was! So there you have your design, and now all you have to do is clean up the stray polish with a Q-tip or brush dipped in nail polish remover. Also, if I find that one section of color is really sheer, I'll go back over that section with a small nail art brush dipped in that color. For example in the picture above, you can see that the yellow is pretty sheer, so I dipped my brush in the yellow polish and basically "colored in" the yellow part darker. This is completely optional though; hopefully your design will come out perfect without this!

So then I just topped it with my go-to topcoat, Beauty Secrets.

Here are some bonus pictures:
100_0083
My workstation

100_0106
Even the trash is pretty! =P

100_0107
This shows how small (and adorable) that cup is =]


(And yes, that is a Hot Topic polish in the background of that last picture; my sister gave it to me today, and I'll swatch it at a later date!)

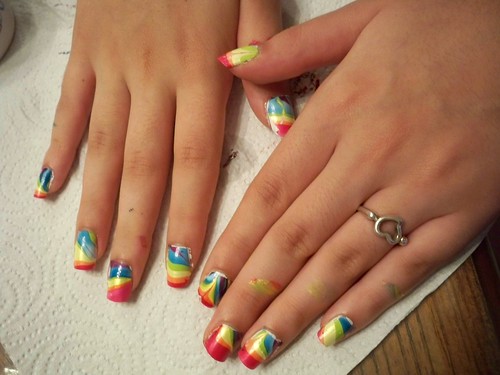
So, here's the look pre-topcoat, and even pre-cleanup. For pictures of this finished manicure, like I said earlier, click HERE.
100_0105


Please give this a try! It takes practice, but once you get the hang of it, it gets easier. Plus the results are awesome!
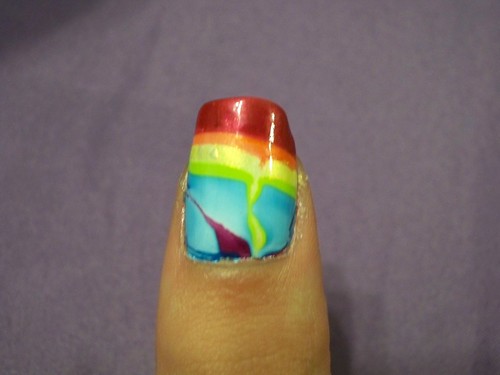
Thank you for reading this incredibly long entry, and special thanks to my 7 followers =]

Have a great day,

Janna